


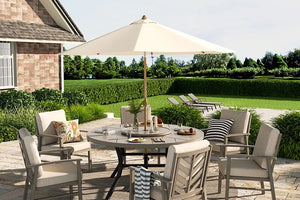


How to Build an Outdoor Bar: Step-by-Step DIY Guide

Building an outdoor bar means creating a sturdy, weather-resistant serving station with a level base, exterior-rated lumber, a durable countertop, storage, seating space, and proper sealing.
This guide explains how to build an outdoor bar for a patio, deck, or backyard using basic carpentry tools and beginner-friendly construction steps. Written from a practical DIY home-improvement perspective, it follows common outdoor woodworking practices, residential bar-height guidelines, and weather-resistant finishing principles used in backyard projects.
Readers will learn how to plan the layout, choose materials, build the frame, add panels and shelves, install the countertop, seal the bar, avoid common mistakes, and maintain it for long-term outdoor use.
Step 1: How Do You Plan Your Outdoor Bar Before Building?
Plan your outdoor bar by choosing the location, size, layout, budget, storage needs, seating space, and weather exposure before buying materials. Good planning prevents unstable construction, poor traffic flow, wasted lumber, and expensive changes later.
Choose a flat, convenient location such as a patio, deck, concrete slab, or compacted paver area. The spot should have good drainage and enough space for guests to move around the stools.
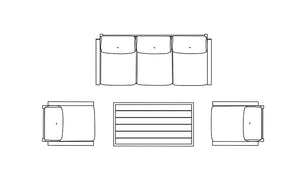
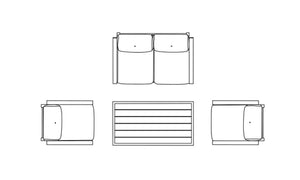
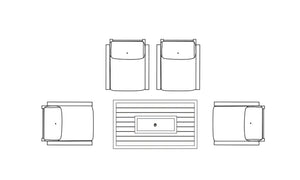
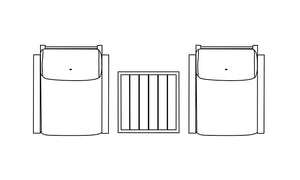
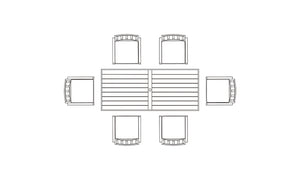
A common bar-height counter is about 40 to 42 inches tall, which works with many bar stools around 28 to 33 inches high. For a DIY outdoor bar, a 24-inch depth and 4- to 8-foot length are practical starting points, but the final size should match your space, seating plan, and storage needs. Leave enough front overhang for stools and enough clearance behind them for walking.
Decide whether the bar will be a simple straight bar, rolling bar, L-shaped bar, tiki-style bar, or storage-focused bar. For beginners, a straight rectangular bar is the easiest and most practical option.
Also check local rules before adding electrical outlets, plumbing, permanent roofing, or built-in appliances.
Step 2: What Tools and Materials Do You Need?
To build an outdoor bar, you need exterior-rated lumber, weather-resistant screws, a countertop material, outdoor paint or stain, sealant, measuring tools, cutting tools, a drill, clamps, a level, sandpaper, and safety gear.
Essential tools include:
● Circular saw or miter saw
● Drill and drill bits
● Tape measure
● Speed square
● Level
● Clamps
● Sander or sanding block
● Safety glasses, gloves, and dust mask
● Common materials include:
● Pressure-treated lumber or cedar
● 2x4s for the frame
● 1x4s, 1x6s, or panels for cladding
● Exterior screws
● Wood glue or construction adhesive
● Countertop boards, plywood, concrete, tile, or stone
● Exterior stain, paint, or wood sealant
Pressure-treated pine is affordable and durable, while cedar costs more but naturally resists rot. If any part of the bar sits close to the ground or may stay damp, choose lumber rated for ground contact and check the end tag before buying. Use galvanized or stainless steel fasteners outdoors to reduce rust and staining.

Step 3: How Do You Prepare the Base and Work Area?
Prepare the base by choosing a flat, stable, and well-drained surface. A level work area helps keep the frame square, prevents wobbling, and protects the bar from standing water and soil moisture.
Clear a workspace large enough to lay out lumber and move safely around the frame. A concrete patio, garage floor, driveway, or flat deck works well for assembly.
Use a level to check the ground in multiple directions. If the surface slopes too much, choose another spot or prepare a compacted paver base. Avoid placing wood directly on grass or bare soil because moisture can cause rot.
Set up sawhorses for cutting and organize lumber by size before starting. Mark pilot hole locations near board ends to prevent splitting when screws are installed.
Step 4: How Do You Cut the Lumber and Build the Frame?
Cut the lumber according to your planned dimensions, label each piece, and assemble the bottom frame, vertical legs, top frame, and cross braces. A square and rigid frame is the foundation of a safe outdoor bar.
Start by cutting the lumber for:
● Bottom rectangle
● Top rectangle
● Four vertical legs
● Cross braces
● Shelf supports
Build the bottom rectangle first using exterior screws. Check that each corner is square. Attach the vertical legs, then secure the top frame to the legs. Add cross braces to prevent wobbling and support the future countertop.
Use pilot holes to reduce splitting, especially near board ends. After assembly, check the frame for level, square, and plumb before moving on to panels or cladding.
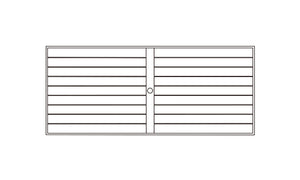
Step 5: How Do You Add Panels, Cladding, and Exterior Sides?
Add panels or cladding after the frame is stable. Exterior sides improve the appearance, protect the inner structure, and can be made from wood slats, exterior plywood, composite boards, cement board, or metal panels.
Wood boards create a traditional outdoor bar look. Attach them horizontally or vertically to the frame using exterior screws, galvanized finish nails, or siding nails rated for outdoor use. Avoid relying only on light brad nails for structural or weather-exposed cladding. If installing horizontal boards, slightly overlap them or leave proper spacing for drainage and expansion.
Composite cladding needs less maintenance, while cement board works well under tile or stone veneer, but seams and edges still need proper sealing or waterproofing. Leave access openings if you plan to add storage doors, a cooler bay, or removable service panels.
Seal all exposed panel edges after installation because cut wood absorbs moisture faster than factory-finished surfaces.
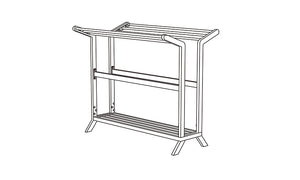
Step 6: How Do You Build Shelves and Storage?
Build shelves and storage inside the bar after the frame and panels are installed. Shelves, dividers, hooks, and cooler bays make the bar useful for glasses, bottles, napkins, utensils, ice, and serving tools.
Use plywood or solid boards for shelves. Support them with cleats, shelf pins, or fixed frame supports. Fixed shelves add strength, while adjustable shelves offer more flexibility.
Leave enough height for bottles and glassware. A spacing of about 10 to 14 inches works for many bar items. Keep the lowest shelf raised above the ground to reduce moisture exposure.
If adding a mini fridge, use only an outdoor-rated model and allow proper ventilation. Electrical work should use outdoor-rated components and professional installation when required.
Step 7: How Do You Install the Countertop?
Install the countertop by checking that the frame is level, dry-fitting the top, adding proper support, applying exterior adhesive if needed, and fastening it securely. Heavy countertops need stronger framing and careful handling.
Common outdoor bar countertop options include:
● Sealed wood
● Marine-grade plywood fully sealed on all faces and edges
● Concrete
● Tile
● Granite or stone
● Stainless steel
A wood countertop is easy to build but needs regular sealing. Concrete and stone are more durable but much heavier. Tile is easy to clean but needs outdoor adhesive, sealed grout, and proper waterproofing underneath.
Allow a 1 to 2 inch front overhang for comfort. Keep the serving surface nearly level and prevent pooling with sealed edges, covers, and good drainage. Sand sharp edges and seal the countertop before regular use.
Step 8: How Do You Waterproof, Paint, and Seal the Bar?
Make the outdoor bar more weather-resistant by sanding surfaces, sealing cut ends, filling gaps with exterior caulk, applying outdoor paint or stain, and sealing the countertop. Proper finishing protects the bar from rain, sun, cracking, swelling, and mildew.
Follow this order:
1.Sand rough surfaces and edges.
2.Remove dust with a clean cloth.
3.Seal cut ends, screw holes, and joints.
4.Apply exterior stain or paint.
5.Add a second coat after drying.
6.Seal the countertop with the correct product.
Use exterior-rated paint, outdoor wood stain, spar urethane, concrete sealer, grout sealer, For direct food contact, use a finish specifically labeled for food-contact use. Let the finish cure fully before placing drinks, stools, or accessories on the bar.
Step 9: How Do You Add Seating, Lighting, and Accessories?
Add seating, lighting, and accessories after the bar is sealed and dry. Choose stools that match the counter height, use outdoor-rated lighting, and add practical features that improve serving, storage, and comfort.
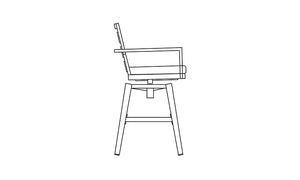
For a standard 42-inch bar, use stools around 30 inches high. Leave about 24 to 30 inches of width per person for comfortable seating.

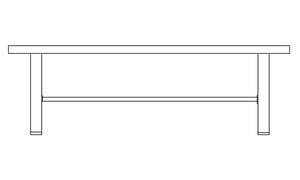
Shop the look: Winston Outdoor Bar Table and 4 Barstools
https://peakhomefurnishings.com/products/winston-outdoor-bar-table-and-4-barstools
Useful accessories include:
● Bottle opener
● Towel hooks
● Ice bucket or cooler
● Glass rack
● Napkin holder
● Cup storage
● Menu board
● Outdoor cover
For lighting, use outdoor-rated string lights, solar lights, LED strips, or task lights. Use outdoor-rated fixtures, GFCI/RCD protection where required, and a licensed electrician for new wiring.
Step 10: How Do You Maintain an Outdoor Bar After Building It?
Maintain an outdoor bar by cleaning spills quickly, covering it when not in use, checking screws and joints, resealing exposed surfaces, and repairing cracks, peeling paint, or damaged wood before moisture reaches the frame.
After each use, wipe down the countertop, remove food debris, and dry wet surfaces. Monthly, check for loose screws, warping, cracks, rust, or damaged sealant.
Inspect once or twice a year and reseal according to product instructions and visible wear. In winter or heavy storms, cover the bar and store cushions, fabric items, and small accessories indoors.
Good drainage around the bar is also important. Standing water near the base can shorten the life of the structure.
What Mistakes Should You Avoid When Building an Outdoor Bar?
Avoid using indoor materials, building on uneven ground, skipping waterproofing, under-supporting the countertop, forgetting drainage, ignoring stool clearance, and using non-rated electrical parts. These mistakes can make the bar unsafe or short-lived.
The most common mistakes include:
● Using untreated indoor lumber
● Using screws that rust outdoors
● Building on grass or unstable soil
● Making the frame too weak for the countertop
● Forgetting to seal cut wood ends
● Skipping pilot holes near board edges
● Leaving the bar uncovered in harsh weather
● Adding electrical features without outdoor-rated protection
Measure twice before cutting, use exterior-rated materials, and finish every exposed surface before regular outdoor use.
FAQs
How much does it cost to build an outdoor bar?
A basic DIY outdoor bar can often cost about 300to300 to 300to1,500 for materials, depending on size, local prices, and upgrades. Simple wood bars cost less, while concrete, stone, tile, appliances, and roofing increase the total cost.
What is the easiest outdoor bar to build?
The easiest outdoor bar is a straight rectangular frame made with 2x4 lumber, wood cladding, simple shelves, and a sealed wood countertop. This design uses basic cuts, simple joints, and standard tools.
What is the best wood for an outdoor bar?
Pressure-treated pine and cedar are two of the best choices. Pressure-treated pine is affordable and durable. Cedar costs more but naturally resists rot and has a better appearance.
What is the best countertop for an outdoor bar?
The best countertop depends on budget and maintenance needs. Sealed wood is affordable and easy to install. Concrete, tile, granite, and stainless steel are more durable but require stronger support and careful sealing.
Do you need a permit to build an outdoor bar?
A small freestanding outdoor bar usually may not need a permit, but permanent structures, electrical wiring, plumbing, roofing, or built-in appliances may require approval. Always check local building codes, HOA rules, and utility requirements before construction.
Related Articles

Are Waterproof Cushions a Myth? Why Sunbrella® ...
A brand-new set of patio cushions survives exactly one summer storm before it starts smelling like a basement. The fabric feels clammy. Dark spots appear along the seams. The listing...
Are Waterproof Cushions a Myth? Why Sunbrella® ...
A brand-new set of patio cushions survives exactly one summer storm before it starts smelling like a basement. The fabric feels clammy. Dark spots appear along the seams. The listing...
Continue Reading
How to Measure Covers for Sofa Sets: Sectionals...
Your outdoor sofa is more than just furniture—it's where morning coffee moments happen, where friends gather for evening conversations, and where you unwind after long days. Protecting this investment from...
How to Measure Covers for Sofa Sets: Sectionals...
Your outdoor sofa is more than just furniture—it's where morning coffee moments happen, where friends gather for evening conversations, and where you unwind after long days. Protecting this investment from...
Continue Reading
The Truth About Cheap Wicker: How to Identify U...
A homeowner spends several hundred dollars on a "wicker" outdoor furniture set. It looks great on arrival — the weave is tight, the color is rich, and the listing promised...
The Truth About Cheap Wicker: How to Identify U...
A homeowner spends several hundred dollars on a "wicker" outdoor furniture set. It looks great on arrival — the weave is tight, the color is rich, and the listing promised...
Continue Reading